Voice Actor’s Guide in Choosing a Microphone

by Erica Rosales

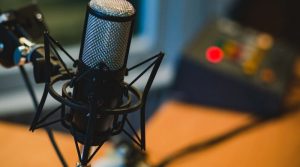
Your microphone is the linchpin of all your equipment – your best friend in your lifelong career as a voice actor. Despite the magic an audio editing software can do, the quality of your microphone plays the biggest role in determining the overall quality of your voice over recordings. For this ultimate reason, it’s truly a daunting task for voice actors to choose a microphone.

But in the brand spectrum of every product, we always know what’s topnotch. So what actually makes it hard for us to settle for a purchase when we already knew what’s superb? It’s hard to decide because let’s admit it, we’re all down to the monetary concerns. Practically, you would first dig deep into the popular and latest claims on the best microphones at a very affordable price.

The good news is, contrary to popular belief, the cost is not perfectly parallel to the microphone’s quality. The microphone is actually not one-size-fits-all equipment. It’s relative to your voice, your studio, and the supporting tools alongside.

The Voice Realm presents this definitive guide in choosing a microphone that spans across different microphone types, connectivity, mic character, quality, and budget. Let’s take a look at what’s well worth the investment for you.

Three Types of Microphones
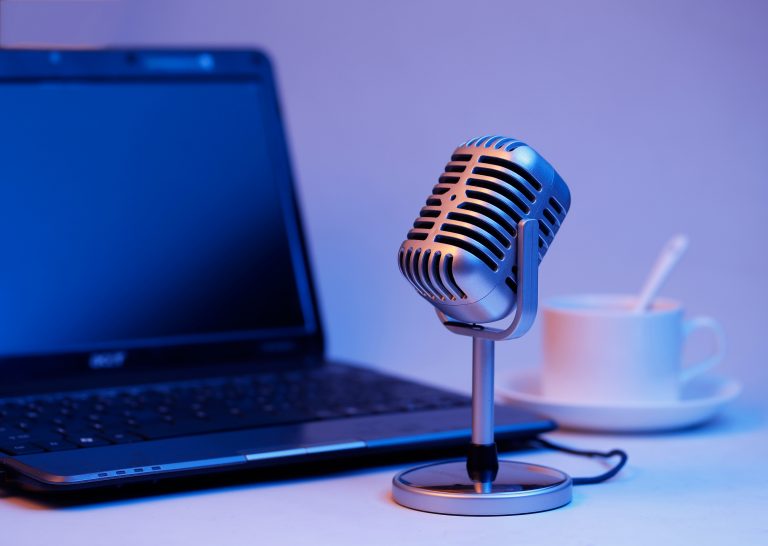
USB Microphone

This kind of mic is what we highly recommend if you are really on a tight budget and are after portability. There are USB mics that are also condenser mics. USB mic plugs directly to your computer’s USB port without any additional equipment, making it very convenient if you do most of your projects at your home studio or if you’re always on the go with your laptop. This mic type captures an above-average sound which is not bad for entry-level voiceover project. However, USB microphones are not as versatile as the regular microphones because they are dependent on your computer. Therefore, USB mics are not for you if you do more of your work in the field or stages.

Read the rest of the article at The Voice Realm…

Taking Your Show On The Road

by 

I just recently went to my first podcasting convention (MAPCON, now the Independent Podcast Conference in Atlantic City) and had the privilege of meeting a lot of super talented and passionate people who create and have services for, podcasters (of which, I am now one!).  One of the topics that came up time and time again, was sound treatment.  How do you get the best sound for your podcast?  How do you get rid of echo, cut down on ambient noise, and travel with your sound equipment while still putting out a decent show?

A lot of people will tell you that it’s all about the microphone.  And it’s true that if you use a microphone that’s highly directional and of decent quality, you can get pretty good sound.

BUT – without the right recording environment, your audio still isn’t going to sound very good – no matter how expensive your microphone is.

I’m here to tell you – it’s all about the sound treatment.

As a voice actor, I have a 5×4 sound treated booth that has thick, insulated walls and a similar ceiling and floor, all carpeted so there are no sharp edges or surfaces for sound to echo off of. (I’ve included a picture below of both the inside and outside of my booth.) It makes for an almost entirely dead sound that engineers prefer, because then they can go in and color that sound in post, the way they need it.  You probably don’t need this elaborate a set-up as a podcaster, but you get the idea.

Read the rest of the article at VoiceoversAndVocals.com…

Source-Connect is the Standard and I’m a Standard Bearer

by Peter K. O’Connell

There are nice things about being in a club.

I’m not talking about the leather-chair, cigar smoking clubs out there (I’ve been members at those kind of clubs…they are not that big a deal).

I’m mean like clubs where members share a common interest and can talk about things you each know about and, as a member, you can learn from people who share your interests…like audio production and voiceover. Turns out there’s a kind of club for that.

Technology brought a lot of change to the industry, some of it bad (pay to play voiceover web sites) and some of it good.

One of the good things was Source-Connect, which uses codecs and the internet to offer recording studios, media producers, voiceover talents like me and other audio professionals high-quality options to record and monitor recording sessions remotely.

Source-Connect is (has been) replacing ISDN, which was the industry standard for remote recording.

Read the rest of the article at Voxmarketising…

Top 15 Best Microphones for Voice Over Recording

by Voice Over Herald

In the article “Voice Actor’s Guide in Choosing a Microphone”, we have covered the major types of voiceover microphones and the comparison amongst them. After thorough research and based on the experiences of our voice actors, we have compiled and narrowed our top picks on the best microphones taking into consideration many factors especially the price tag.

Here’s what we recommend for the best USB Microphones:

Apogee Electronics MiC Plus USB Cardioid Condenser Microphone

$259.94

Small and light enough to carry on the go, the Apogee MiC Plus is a USB cardioid condenser microphone designed to provide easy setup and high-resolution audio for singers, podcasters, video bloggers, and musicians in home recording rooms, project studios, and portable setups. Its cardioid polar pattern attenuates the signal from behind the microphone to minimize room reflections in the recording. The internal A/D converter supports resolutions up to 24-bit/96 kHz. This is one of the best choices if you are podcasting outdoor.

Audio-Technica AT2020USB PLUS Cardioid Condenser USB Microphone

$149.00

One of the popular USB microphones that is of high quality and affordable is this handy mic that has a built-in desktop stand to fit nicely on your office desk, mix and volume control, a headphone jack on the unit itself, as well as easy plug-n-play capabilities. The audio resolution hits up to 16-bit/48 kHz with its built-in A/D converter. This one is highly rated by many voice actors for its overall quality for a very affordable price.

Blue Snowball iCE Condenser Microphone, Cardioid

$43.93

The Snowball iCE is a cheap USB mic with decent quality to get your job done. It comes with a sleek size and adjustable built-in mini tripod. This type is travel-friendly or can fit nicely in an existing office or laptop setup. The specs include a mini custom condenser capsule with a cardioid polar pattern, resolution of 16-bit/44.1 kHz and a small weight of about a pound.

Read the rest of the article at Voice Over Herald…

Bootstrapping a Career in VO: Start Where you Are, Grow as you Go

by The Voice-Over Roadmap

If you’re interested in pursuing a career as a VO Talent, it can be tempting to be a perfectionist and want to have everything just right before you get yourself out there and start looking for work. It can also be daunting and confusing to even know where to begin.

When I first started entertaining the idea of pursuing VO work, I did some research and came across tons of other talent who had impressive VO training backgrounds, years and years of experience, and huge lists of credits. It was super intimidating and made me question how I could ever compete for work against these people when I had literally zero VO experience or coaching.

I decided to take a shot anyways and despite my limited experience, self-produced demo reel, less than stellar performance skills, and empty credit list, I was actually able to land a gig after a few weeks of auditioning, and another a couple weeks later, and then things snowballed from there. All of that led me to where I am now, with years of experience, several demo reels showcasing actual work I’ve done, vastly improved performance skills, and a long credit list of my own.

The point I am trying to make is that I started. Sure there are a few things that you should get ready before you launch (which I’ll cover in this post) but it’s important to not fall into traps of perfectionism and over-analysis. You don’t need to be world-class when you get started, you just need to get started where you are, and take comfort in the fact that it’s ok to learn and grow as you go.

This post has also been formatted as a free e-book which you can download as part of the Resource Package by clicking the button at the bottom of the post!

THE BARE ESSENTIALS

While the overall theme of this post is to get started where you are and not fall victim to perfectionism or over-analysis, there are still a few things you will need to get squared away before putting yourself out there, both tangible and intangible. First let’s look at the tangible items you will need to have.

Equipment

In the current state of the VO industry, it’s pretty much mandatory to have a home recording set-up. You’ll want to make sure you have a:

  • Microphone (Ideally not a USB mic, but a more professional Condenser or Dynamic)
  • Mic Stand (Unless you plan to hold your mic in front of your face at all times and have crazy arm strength, you’ll probably want one of these)
  • Pop Filter (This will reduce plosives in your recording, professional VO recordings don’t have audible plosives, so you’ll want one of these)
  • XLR Cable (To plug your Mic into your interface)
  • Recording Interface (A piece of hardware that takes the signal from your Mic and gets it into your computer)
  • Computer (You’ll need some sort of computer, be it a desktop, laptop, or tablet to run your audio recording software)
  • Recording Software (The software that will run on your computer and allow you to capture and edit audio)
  • Recording Space (A treated space where you can record in that will provide an acoustically “dead” sound)
Starting where you are with Equipment

While the above list may look a little daunting if you have no prior experience with audio or recording, the good news is that you likely have some of those items already or can put them together yourself. For the ones you will likely need to purchase, you can start out with lower end equipment when your are starting out. I’ll give you some typical price ranges to expect. Let’s take a look at each one and see how to get started with the least expense:

Read the rest of the article at The Voice-Over Roadmap…

Using “Creative Inelegance” to Soundproof Your Studio

One of my first jobs was running live sound for bands at a local amusement park. From this, I learned a lot about about acoustics and noise. (I also learned a LOT about working with demanding customers.) So when I decided to start doing voiceover seriously and set up a studio in my home, I was certain I could construct a recording environment that would work for VO. I found the quietest place in my house I could find – my closet – and using some heavy duty clamps I picked up, I clamped heavy blankets and comforters around the inside shelves of the closet. If you can afford them, heavy duty quilted moving blankets work really well to absorb the sound. If you can’t afford that, just use comforters, regular blankets, or anything you have on hand, as long as they’re thick and heavy. I also bought some cheap throw rugs and placed them on my concrete floor to help absorb the sound there too.

I originally couldn’t afford a mic stand, but thankfully the USB mic I bought came with a desk stand. So I placed the mic on one of my shelves, then surrounded it with a couple of old pillows I had.

And to my surprise, this set up – as ghetto as it was – worked pretty well. The audio that came out of this rig was remarkably noise free.

Never be afraid of what I like to call “creative inelegance.” Necessity is the mother of invention. No matter how janky it may look, no matter how much your friends may laugh when you tell them, if it sounds good, that’s all that matters.

And why in the Hell are you telling your friends in the first place? Just say that you built a voiceover studio in your place. That’s all they need to know. That’s what you should tell a potential client. Tell them that you’ve custom built your studio with a focus on acoustics. Because that is exactly what you’ve done.

A thing about acoustics

There are two kinds of unwanted sounds you’re going to be dealing with when you work on your studio: noise from the outside, and reflective noise – or “flutter echo” – from the inside.

Read the rest of the article at MarleyAudio.com…


Do I Need A Sound Reflection Filter In My Home Studio?

by Hugh Edwards

The question “Do I need a sound reflection filter in my home studio” is often asked to us in our mentoring area at Gravy For The Brain. This blog will provide a definitive answer to that question!

The first thing we need to do to answer this question, is define what a home recording studio (or any recording studio for that matter) is, how mic’s work, and how it’s all used.

What’s the Point of a Home Recording Studio?

The point of a home recording studio is to provide a stable, repeatable recording environment with no sound ingress and no sound egress, while minimising any unwanted noise/sound reflections going into the microphone.

What does all that mean!? Let’s go through them one by one:

  • A stable and repeatable recording environment: We need to be able to have consistency in the recordings so that we can record a project on day 1, and then for example, do re-records/pickups two weeks later and have the recorded sound match exactly.
  • No sound ingress: We do not want any external sound coming into our recording area – the only thing we should pick up is the mic, not noise from the kitchen, passing cars, nearby school-kids screaming, the cat whining for even more food and so on.
  • No sound egress: Likewise we don’t want our ranting, wailing, screaming, crying or otherwise fantastic voiceover dialogue to bleed into the kitchen and upset the said cat – she’s trying to eat the food you just gave her.
  • No Sound reflections: Sound reflections are the sound recordist’s nemesis. The perfect scenario is that your mic picks up just the vocals that you speak into it. Let’s consider then an extreme example of recording in the kitchen, by the cat; you speak into the mic and the mic picks up your vocals. At the same time your vocals reflect off the wall and into the mic creating a tiny delay, which the mic pics up. At the same time, the vocals reflect of the ceiling which is a different distance to the mic, and is picked up with a different delay. At the same time, your vocals reflect off the cat bowl and then the ceiling and then the wall, and are then picked up by the mic with, again, a different delay. In reality your vocals are bouncing off all walls, ceilings, floors and objects in the room, and all are being picked up by the mic….which sounds like….reverb. This noise in fact, is your room noise. It sounds like a kitchen. The noise of a kitchen sounds pretty awful for recorded vocals and the aim is to remove all sound reflections altogether so that we just get your pure vocal into the mic and that only.

Read the rest of the article at Gravy for the Brain…